hCG Diet Zucchini Fritters and Red Pepper Relish

These versatile zucchini fritters are so quick and easy it is worth cooking up a bigger batch.  They’re so handy for breakfast served just on their own. Total Time 6 minutes Servings 2

Ingredients

  • 2 cup zucchini grated
  • 3 free range eggs
  • ½ tbsp coconut oil for cooking
  • ½ tsp nutmeg
  • 1 flat tsp sodium fre chicken stock powder 
  • Ground pepper

Roast Red Pepper relish 

  • 2 large red red peppers
  • 2 cloves garlic crushed
  • 1 onion chopped finely
  • 1 tsp grated ginger
  • ½ tsp himalayan pink sea salt
  • ½ tsp stevia 
  • 1 cup apple cider vinegar

Instructions

Fritters

  • In a bowl combine the zucchini, eggs, nutmeg, stock powder and ground pepper.  Stir until well mixed.
  • Heat oil in a large non stick frying pan over a high heat.  Mould the mix into balls, drop into the pan and press flat, then reduce heat to medium.  When brown on one side turn over and cook other side.
  • Serve topped with roasted red pepper relish.

Relish (optional)

  • Remove the seed and core from the red peppers.  Place under a hot grill until the skin starts to blister and blackens slightly. Then remove and wrap individually in cling wrap and leave for several minutes to ‘sweat’.   Unwrap and peel the skin off the peppers, then chop the flesh.  Add this to a sauce pan with all the other ingredients. Bring to the boil and cook for 30 minutes, or until a chutney-like consistency is reached.  Check taste – if not sweet enough you may need to add a little more Stevia powderstir well.  Pour into sterilised containers, seal and refrigerate.

Notes

If you have time though you could add a couple of rashers of smoked turkey or chicken to make a really scrumptious breakfast. For lunch they are your protein source, just add a green salad.For another quick change add some roasted vegetables and the humble zucchini fritter becomes a great dinner.  The roasted red pepper relish can be made in larger batches and kept in the fridge. If time is your challenge you can buy relish, just check the sugar content.Cooking and preparation time: fritters (6 minutes) – relish (45 minutes)

hCG Diet Horseradish Sauce

hcg-recipe-horseradish-sauce

Ingredients:

¼ c. Fat Free Mayonnaise (Preferably use your own homemade hCG Mayo)
¼ c. Fat Free sour cream
1 T. Dijon mustard
2 green onions, finely chopped
2 t. ground horseradish

Procedure:

Place all ingredients in a small bowl and mix until well blended.


Refrigerate. Serve over steak, or meat of your choice; also makes a good dip for vegetables.


Makes approx. ¾ cup; serving size is 1 tablespoon


Calories: 13 per serving Fat: 0 g.

hCG Diet Angelica Jam..

Image result for angelica jam

Angelica may be familiar as the acid-green crystallised or candied strips used as a decoration on cakes and desserts, but angelica itself is a herb. It is known as ‘herb of the angels’ (hence the name) because it was believed to have medicinal properties. It’s a member of the parsley family, a tall plant with a long firm stem and bright green leaves. Candied angelica is made by boiling the stems in sugar syrup. If you can find the fresh herb (almost impossible) the stems can be cooked with rhubarb or apple for pies or crumbles. They’re also used in jams and preserves, and the leaves go well with fish or in salads.

Ingredients

  • 700gms stevia (granulated)
  • 900g cooked angelica stems
  • 425ml water
  • Rind and juice of a lemon

Method

  1. Choose young tender stems from two-year-old plants. Remove all leaves then cut into lengths that will fit your pan. Fill the pan with water, bring to the boil, add the stems, return to the boil, then lower to simmer. Cook until the stems are tender, approx 25-45 mins depending on the thickness of the stems.
  2. Strain. Refill the pan with fresh cold water and leave the stems to soak overnight (12 hours). Strain and throw the water away.
  3. You may find that if you have used mature stems that they need to be peeled. If that is the case do so now. Then weigh the stems. For every 900g of angelica stems you will need 700g of stevia granulated sweetner
  4. Cut the cooked stems into bite-size pieces, add them to a large saucepan. I use a preserving pan which is a very worth while investment especially if you are often making chutneys, jams and jellies.
  5. Add the water and the stevia. Over a very low heat, stir constantly until the stevia is dissolved, then add the lemon juice and rind. Bring to the boil and boil rapidly until setting point is reached.
  6. To tell when setting point has been reached either use a thermometer the setting point being 200°F/110°C or put a little jam on a chilled saucer, as it cools the jam should begin to set. It will wrinkle slightly when you draw your finger across it.
  7. Cool slightly before pouring into warm, sterilised jars, cover and seal immediately.

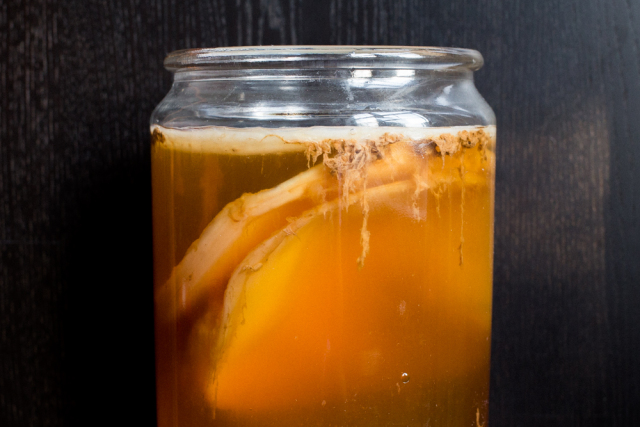
hCG Homemade Kombucha That’s Easy And Cheap

Recipe:

  • 4-8 bags of black tea or 4-8 teaspoons of loose leaf black tea
  • 1 gallon of water
  • 1 cup organic cane sugar 
  • 2 SCOBYs (you can take one and split it or cut it – they’re layered almost like a bunch of pancakes)
  • 1-2 cups starter tea from previous batch

Instructions:

  1. If you bought your SCOBY, follow the instructions given to you to start your homemade kombucha.
  2. Bring to boil a gallon of water. I just pour 2 half gallon mason jars’ worth of water into my stock pot so I don’t have to bother with actually measuring anything.
  3. Add sugar and stir until dissolved. Add tea and remove from heat to cool. Too hot of tea will kill your SCOBY. My mom puts her pot out in the snow sometimes to cool off quicker. If you’re concerned about caffeine you can steep your tea for 30-60 seconds in a cup of hot water before putting in with your sugar water.
  4. Take your starter tea and swirl it around your half gallon mason jars and let it settle in the bottom. The starter tea is acidic and will help your new tea become acidic enough so mold does not grow on your SCOBY. It will act as sort of an all-natural disinfectant.
  5. When tea has cooled enough, pour it into your mason jars with your starter tea. I usually will wait several hours until I can hold my finger in my tea brew.
  6. Place your SCOBY on top of tea and securely cover with thin cloth or paper towel. Your SCOBY will float all over the place as it ferments. The fermentation process is aerobic and needs the air to do its duty. Don’t use anything like cheesecloth because those pesky fruit flies will be able to get into your brew.
  7. Place mason jars in a corner of your kitchen without direct sunlight and let it ferment for several days. The hotter your house is the faster it will ferment.
  8. Start tasting your kombucha on the 4th day to see if it has reached the right balance of sweet and tart. I let my kombucha ferment for about 5 days in the summer and about 7 in the winter. The longer you let it ferment, the less sugar your kombucha will have but it will turn and taste progressively more like vinegar. Ain’t nobody want to drink that.
  9. After your kombucha has reached the right balance of sweetness, start making another batch of tea (steps 1-3), take your SCOBY out and put it on a plate, strain your kombucha while pouring it into another mason jar. Keep about 2 cups for your starter tea! Put the lid on the finished kombucha and put it in the fridge.
  10. Using your new starter tea, repeat steps 4-9.

Flavoring your homemade kombucha (aka second ferment) which is optional:

  1. After your first ferment (when your kombucha is the right taste), take your SCOBY out and put it on a plate. Then add your flavoring!
  2. For flavoring you can add fruit juice, fresh fruit, frozen fruit, dried fruit, spices, herbs, and whatever else you can think of. This is the time to experiment!
  3. Cover jars with a lid and put it back in the corner of your kitchen for another couple of days. Covering your jars produces carbonation because the carbon dioxide (made from the yeast eating the sugar) can’t escape. Don’t let it go too long with covered jars in case of exploding glass. We leave ours for about 4 days.

Tah dah! You have finished your first successful batch of homemade kombucha! You’re now officially a hippie.

A SCOBY is a syntrophic mixed culture of yeast and bacteria used in production of several traditional foods and beverages

hCG Green Jasmine-Mint Iced Tea With Lemon

  • PREP TIME 10 minutes
  • TOTAL TIME 2 hours 10 minutes

RECIPE HIGHLIGHTS

NUTRITIONAL INFORMATION

Makes: 8 servings, about 1 cup each

  • Calories46
  • Fat0 g
  • Saturated fat0 g
  • Mono Fat0 g
  • Cholesterol0 mg
  • Carbohydrates13 g
  • Dietary fiber0 g
  • Protein0 g
  • Sodium5 mg
  • Sugars12 g
  • Potassium39 mg

Here we balance the mildly grassy flavor and slightly astringent mouthfeel of green tea with honey and lemon. Oversteeped green tea can be bitter, so don’t brew it any longer than 3 minutes. And be sure to steep in simmering water: water that looks like it’s steaming, with little bubbles, but not boiling.

INGREDIENTS

  • 1/4 cup loose green jasmine tea, or 12 green jasmine tea bags
  • 1/2 cup fresh mint leaves, plus more whole sprigs for garnish
  • 4 cups simmering water
  • 1/2 cup lemon juice
  • 1/3 cup honey
  • 4 cups cold water

INSTRUCTIONS

  1. Steep loose tea (or tea bags) and mint leaves in simmering (not boiling) water for 2 to 3 minutes.
  2. Strain the tea (or remove tea bags and mint leaves) and pour into a large pitcher. Stir in lemon juice and honey until the honey is dissolved. Add cold water. Refrigerate until chilled, about 2 hours. Serve over ice with mint sprigs, if desired.

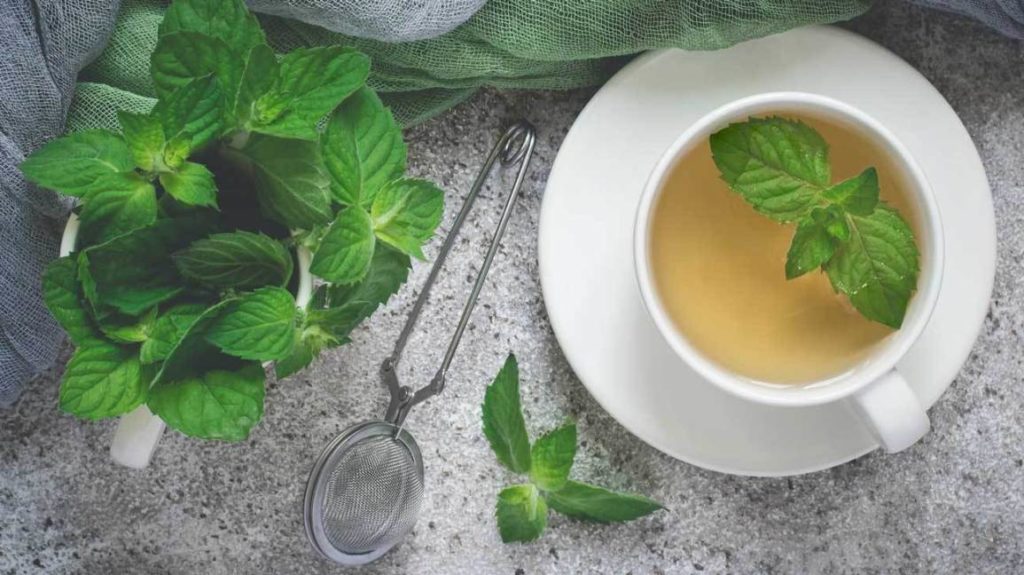
hCG Diet Healthy Peppermint Tea

While peppermint tea is often drunk for its flavor, it may also have several health benefits.

To make your own peppermint tea:

  1. Bring 2 cups of water to a boil.
  2. Turn off the heat and add a handful of torn peppermint leaves to the water.
  3. Cover and steep for 5 minutes.
  4. Strain the tea and drink.

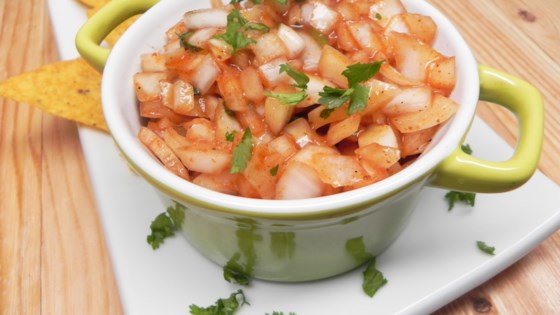
hCG Indian Spiced Onions

A fantastic side for any meal


“Spicy onions just like the ones served in Indian restaurants as a side dish! Delicious!” 

Ingredients

1 onion, chopped

2 teaspoons sugar free ketchup or used some home cooked liquidised tomatoes

1 teaspoon lemon juice

1 tablespoon stevia powder

1 pinch himalayan salt

1 teaspoon chopped fresh cilantro

1 teaspoon chopped fresh fenugreek leaves

1 teaspoon chili powder

I n a medium bowl, stir onion and ketchup/tomatoe mixture until onion is thinly and evenly coated. Mix in the lemon juice. Season with stevia, cilantro, fenugreek and chili powder, and mix thoroughly. Cover, and chill for 24 hours. This allows the lemon juice to neutralize the onion flavor slightly.

hCG Phase 3 4 OVEN FRIED GREEN TOMATOES

Another classic Southern dish right hereeeeee!

Ingredients

  • 4 green tomatoes, sliced thinly, about 1/4 inch
  • 1 1/4 c almond flour
  • 1 t onion powder
  • 1/2 t garlic powder
  • 1/4 t cayenne pepper
  • 2 eggs
  • 1/3 c water
  • coconut oil
  • s&p

Method

Put your oven on broil and place the rack on the second shelf from the top. You want to cook the tomatoes through while simultaneously browning the coating without burning. Too close and you will certainly burn the tomatoes (take a look at the ones on the back of the plate). I used 2 baking sheets for all the tomatoes, but you could use one, and do a switch-a-roo so you only have to clean one pan. Lightly drizzle the baking sheets with olive oil.

Get out two soup bowls (I was going to say cereal bowl, but thought better of it). Mix the eggs and water in one and the almond flour and seasonings in the other. Place the tomato slices in the egg then in the almond flour. Place the tomatoes in a single layer on the baking sheet and drizzle the tops with a bit of coconut oil.

Broil for about 6 minutes on one side, then flip and brown the other side, about another 6 minutes. Sprinkle with a bit of salt right when they come out of the oven. Serve hot.

hCG Phase3 &,4 Low Carb Cauliflower Hummus Recipe

I have been missing hummus in a major way lately, and finally got around to trying this experiment with cauliflower to stand in for the chickpeas.  I noticed recently that my low carb cauliflower puree has the consistency of hummus when cold, and thought if I added just the right ingredients I could mask the cauliflower flavor enough to convince people that it was the real thing.

INGREDIENTS
  • 3 cups raw cauliflower florets
  • 2 Tbsp water
  • 2 Tbsp coconut oil
  • ½ tsp salt
  • 3 whole garlic cloves
  • 1.5 Tbsp Tahini paste
  • 3 Tbsp lemon juice
  • 2 raw garlic cloves, crushed (in addition to above)
  • 3 Tbsp extra virgin olive oil
  • ¾ tsp kosher salt
  • smoked paprika and extra olive oil for serving
INSTRUCTIONS
  1. Combine the cauliflower, water, 2 Tbsp avocado or olive oil, ½ tsp kosher salt, and 3 whole garlic cloves to a microwave safe dish. Microwave for about 15 minutes – or until softened and darkened in color.
  2. Put the cauliflower mixture into a magic bullet, blender, or food processor and blend. Add the tahini paste, lemon juice, 2 raw garlic cloves, 3 Tbsp olive oil, and ¾ tsp kosher salt. Blend until mostly smooth. Taste and adjust seasoning as necessary.
  3. To serve, place the hummus in a bowl and drizzle with extra virgin olive oil and a sprinkle of paprika. Use thinly sliced tart apples, celery sticks, raw radish chips, or other vegges to dip with.
NOTES
Approx. nutrition info per ¼ cup: 141 calories, 14g fat, 3.5g net carbs, 2g protein

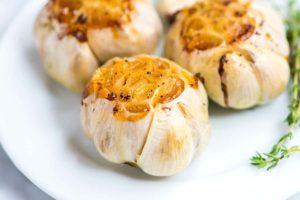
hCG Phase 1,2,3,4 Roasted Garlic

“I love garlic! It’s so easy to roast, and there are so many different ways to do it.

Ingredients

1 medium head garlic (or however many you may need)

2 tablespoons coconut oil

Directions

Method 1: Preheat oven125 degrees C. Slice 1/4 inch off top of garlic bulb. Place in a small baking dish and drizzle with coconut oil. Bake in preheated oven for 20 minutes, until outside is lightly browned and garlic cloves are soft. When cool enough to touch, squeeze each clove to extract softened garlic.

I often mix my garlic with olives as well as baby onions and baby tomatoes.  It makes for an awesome side dish for a braai, roast or for that matter any other meal.