Recipe:
- 4-8 bags of black tea or 4-8 teaspoons of loose leaf black tea
- 1 gallon of water
- 1 cup organic cane sugar
- 2 SCOBYs (you can take one and split it or cut it – they’re layered almost like a bunch of pancakes)
- 1-2 cups starter tea from previous batch
Instructions:
- If you bought your SCOBY, follow the instructions given to you to start your homemade kombucha.
- Bring to boil a gallon of water. I just pour 2 half gallon mason jars’ worth of water into my stock pot so I don’t have to bother with actually measuring anything.
- Add sugar and stir until dissolved. Add tea and remove from heat to cool. Too hot of tea will kill your SCOBY. My mom puts her pot out in the snow sometimes to cool off quicker. If you’re concerned about caffeine you can steep your tea for 30-60 seconds in a cup of hot water before putting in with your sugar water.
- Take your starter tea and swirl it around your half gallon mason jars and let it settle in the bottom. The starter tea is acidic and will help your new tea become acidic enough so mold does not grow on your SCOBY. It will act as sort of an all-natural disinfectant.
- When tea has cooled enough, pour it into your mason jars with your starter tea. I usually will wait several hours until I can hold my finger in my tea brew.
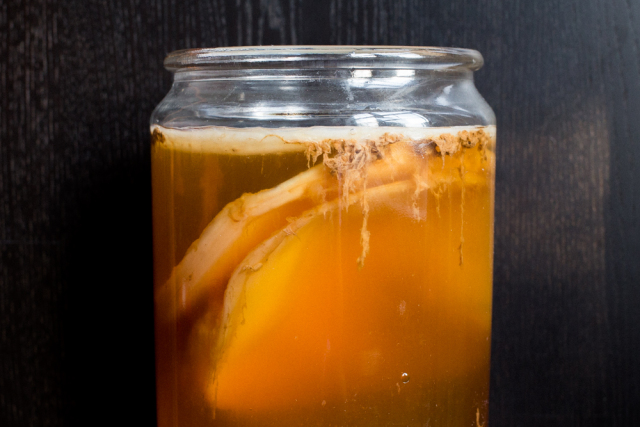
- Place your SCOBY on top of tea and securely cover with thin cloth or paper towel. Your SCOBY will float all over the place as it ferments. The fermentation process is aerobic and needs the air to do its duty. Don’t use anything like cheesecloth because those pesky fruit flies will be able to get into your brew.
- Place mason jars in a corner of your kitchen without direct sunlight and let it ferment for several days. The hotter your house is the faster it will ferment.
- Start tasting your kombucha on the 4th day to see if it has reached the right balance of sweet and tart. I let my kombucha ferment for about 5 days in the summer and about 7 in the winter. The longer you let it ferment, the less sugar your kombucha will have but it will turn and taste progressively more like vinegar. Ain’t nobody want to drink that.
- After your kombucha has reached the right balance of sweetness, start making another batch of tea (steps 1-3), take your SCOBY out and put it on a plate, strain your kombucha while pouring it into another mason jar. Keep about 2 cups for your starter tea! Put the lid on the finished kombucha and put it in the fridge.
- Using your new starter tea, repeat steps 4-9.
Flavoring your homemade kombucha (aka second ferment) which is optional:
- After your first ferment (when your kombucha is the right taste), take your SCOBY out and put it on a plate. Then add your flavoring!
- For flavoring you can add fruit juice, fresh fruit, frozen fruit, dried fruit, spices, herbs, and whatever else you can think of. This is the time to experiment!
- Cover jars with a lid and put it back in the corner of your kitchen for another couple of days. Covering your jars produces carbonation because the carbon dioxide (made from the yeast eating the sugar) can’t escape. Don’t let it go too long with covered jars in case of exploding glass. We leave ours for about 4 days.
Tah dah! You have finished your first successful batch of homemade kombucha! You’re now officially a hippie.
A SCOBY is a syntrophic mixed culture of yeast and bacteria used in production of several traditional foods and beverages